Monday, February 2, 2015

Giant Wall Clock DIY

I wanted to pop in here to show you guys a project I did recently.  Over the last few weeks, I've seen giant wall clocks popping up around the blogosphere.  But when I started looking around for one to buy, I discovered they are quite expensive. Then I got the idea that I could DIY my own.

The first thing I needed was a large round piece of wood.  So I went to my local Habitat for Humanity Restore to look for a table top I could use.

I found this wooden antique table and thought it would be perfect once I took the legs off.  Plus the guy sold it to me for $25 which I felt was a steal.  It's almost 4 feet in diameter, so it's large.


I considered leaving it the natural wood because I loved the aged look it had, but it blended in too much with the color of my wall and I really wanted it to pop, so I decided to paint it white.  I printed out the Roman Numerals "X, V, and I" in a font and size that I liked.  Then Tim figured out the center of the circle so I could find the correct placement of my numbers.  This was the hardest part and it took some trial and error.  And it's definitely not perfect.


I used tracing paper to trace the numerals onto the clock and then painted them in.  And finally, I gave it a good distressing.  We have a large blank area on the wall in our entryway and I've been wanting to put a large statement piece there, so this is where Tim hung it up for me.


I know there are clock kits you can buy to turn it into a real working clock, but I'm kinda loving it the way it is right now.


Saturday, December 27, 2014

Barbie Dollhouse DIY


For the past few months, Tim and I have been working hard on a secret Christmas project for Peyton.

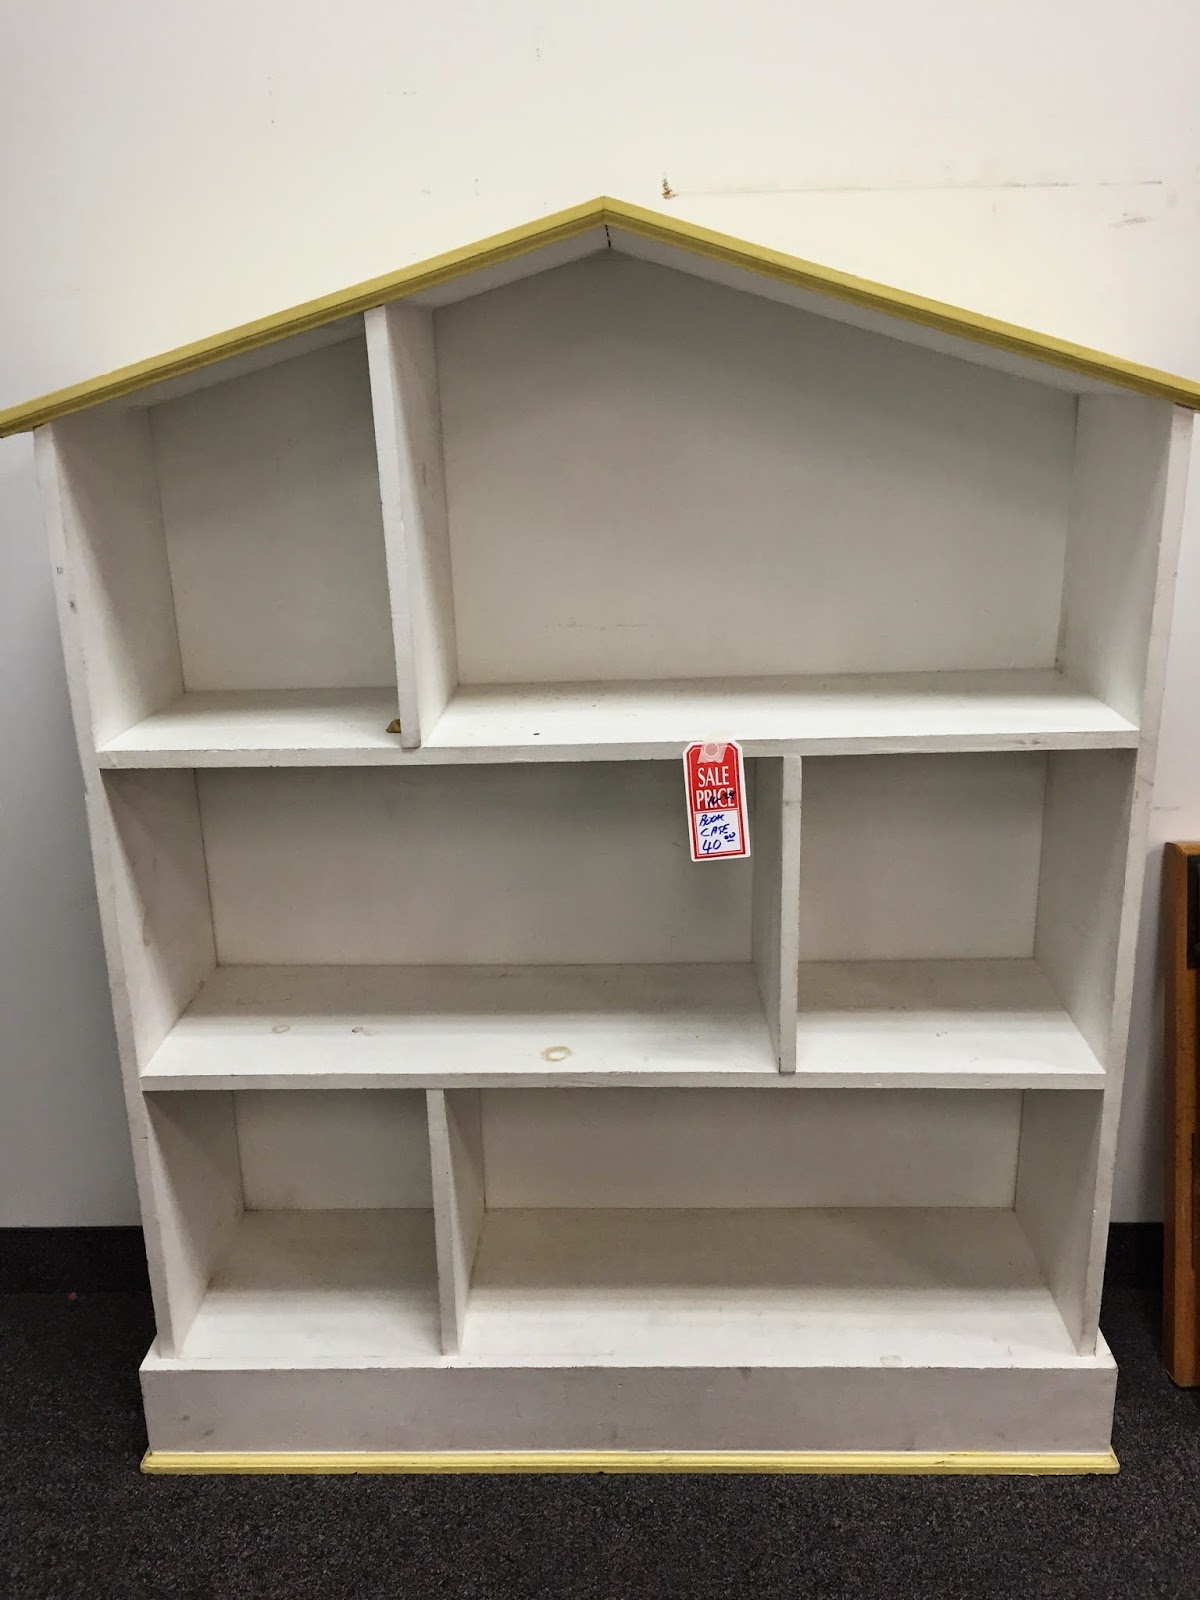
She had been asking for a dollhouse for her Barbies.  Of course, we could have just gone out and bought the Barbie Dreamhouse right off the Target shelf, but where's the fun in that, right!?  And honestly,  I just don't love big plastic pink toys.  Plus months and months ago, I saw this dollhouse at Handmade Home and was totally inspired to do something similar for Peyton one day.  So back in October, when I spied this bookcase/dollhouse at Goodwill, I snatched it up with the intention of giving it a huge Barbie dollhouse makeover just in time for Christmas.


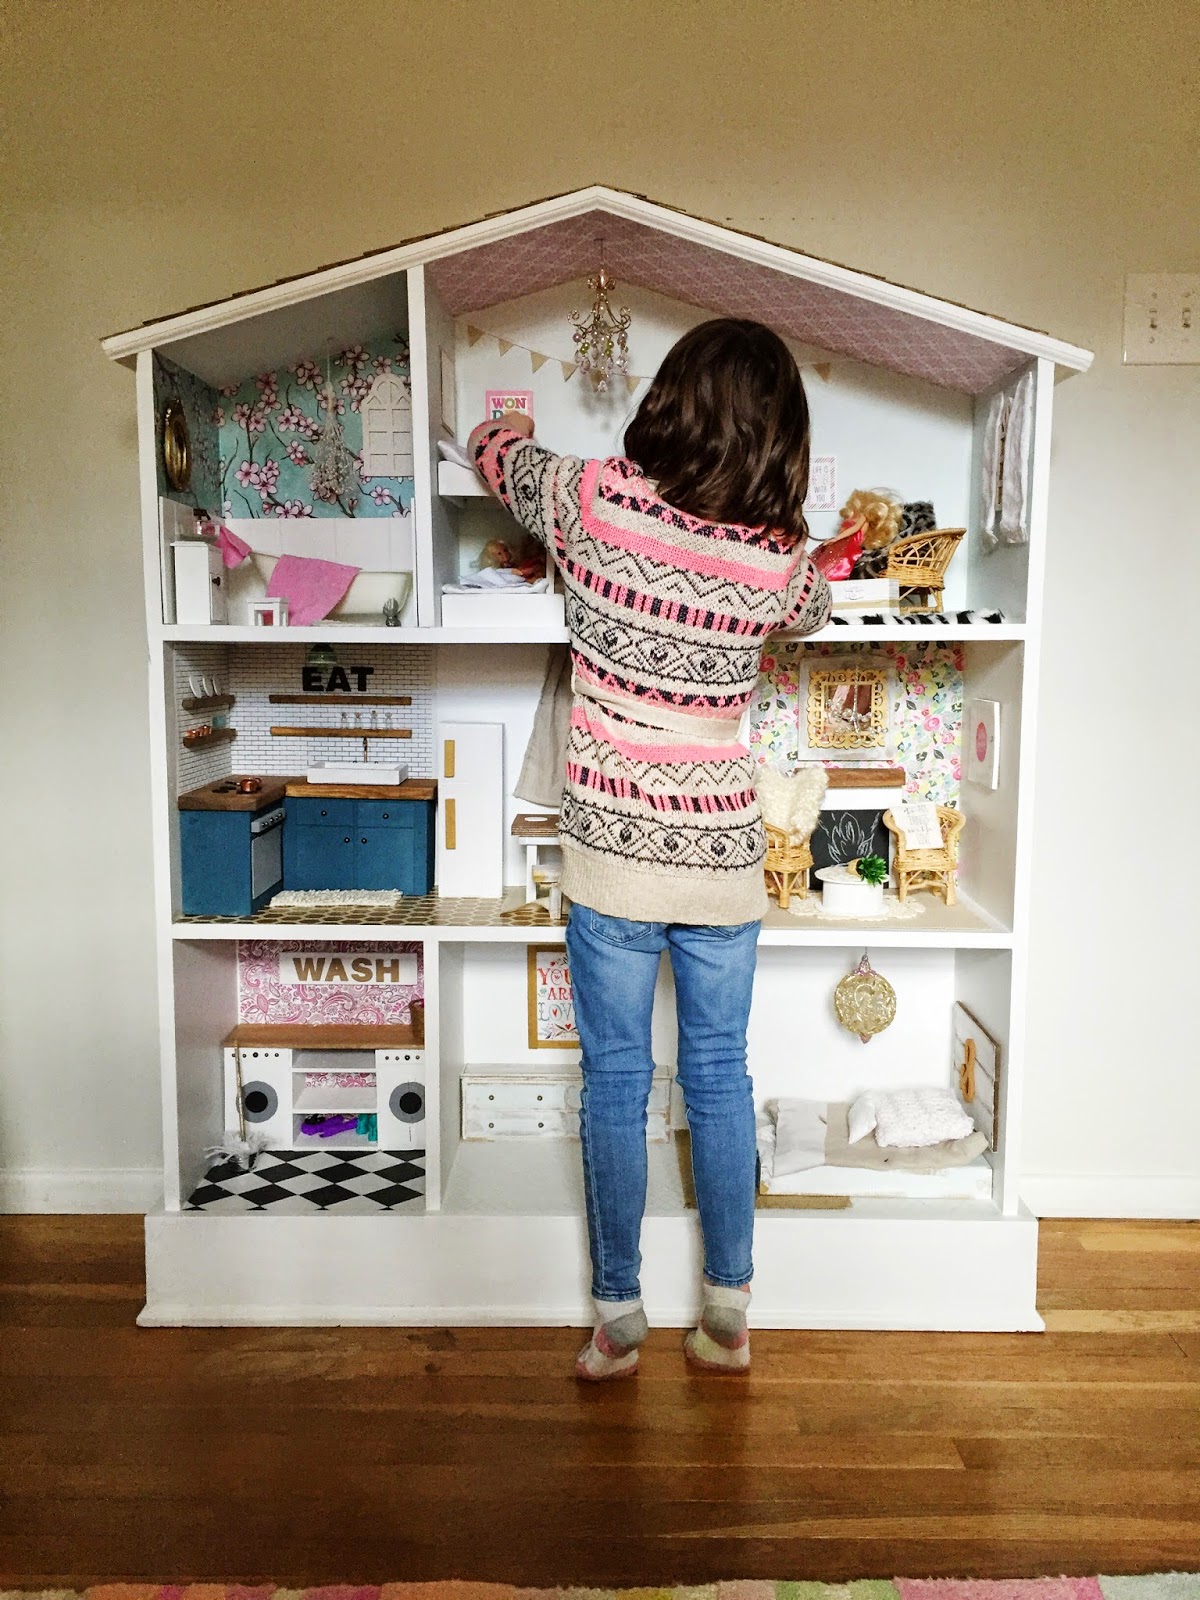
I cannot even tell you the amount of hours and money we put into this thing.  Tim gets so much credit for putting up with me throughout this dollhouse renovation. Basically, he was the carpenter and I was the interior designer.  I made lists of all the projects I needed him to do and in his free time, he worked so hard to get them all done.  (And then I would add more to his list!)  And this isn't so much his thing, but he did it for me and for Peyton.  I am so thrilled with the final product.  And best of all, Peyton loves it too.  She is the type that notices and appreciates pretty design and fun decor, which makes it extra fun for me to do something like this for her. 


So if you're interested, I'm going to take you on a little tour.  If you're not into dollhouse renovations, you may just want to skip this post.  

We'll start with the roof.  Tim cut all these little pieces of wood and attached them for me.  Then I stained them.  It gives the dollhouse a fun cottage feel.


Next up, the bathroom.

I modge podged the walls and the floors with scrapbook paper and then Tim added the beadboard (left over from our mudroom project) to the walls.  I found the bathtub on Ebay.


The bathroom mirror was a tiny picture frame and I glued a mirror on the back (which is hard to tell in this photo because it's reflecting the wallpaper).  The towel holder is a ring pull.  The vanity was a tiny drawer that I cut and glued wood slabs on to make it look like a cabinet.   It was both fun and challenging to figure out creative ways to make dollhouse furniture and accessories throughout this project. 


The girl's room.
I modge podged scrapbook paper on the ceiling and painted gold dots on the floor.  I found the dresser, small chest, and the wood pieces (to make the bunk beds) all at Michaels. 


The chandelier is a Christmas tree ornament. 


 I sewed the bedding, pillows, and curtains all from a shirt that Peyton owned but didn't like to wear.


The kitchen:

The light fixture is a drawer knob/pull.  I found the "subway tile" in the dollhouse section at Hobby Lobby. It was actually a plastic sheet of red brick, but I painted it to look like subway tile.  Tim made the cabinets, countertops, and refrigerator from blocks of wood, which we then painted, stained and embellished.  The "faucet" is just a hook that I painted gold.


The chandelier is another Christmas tree ornament that I painted.  Tim made the farmhouse table and bench.  And I found the small chalkboard at Hobby Lobby.  The floor is modge podged scrapbook paper and the rug is a piece of burlap (found in scrapbook paper section of Michaels).  I sewed the curtains from scrap fabric. 


Living Room:

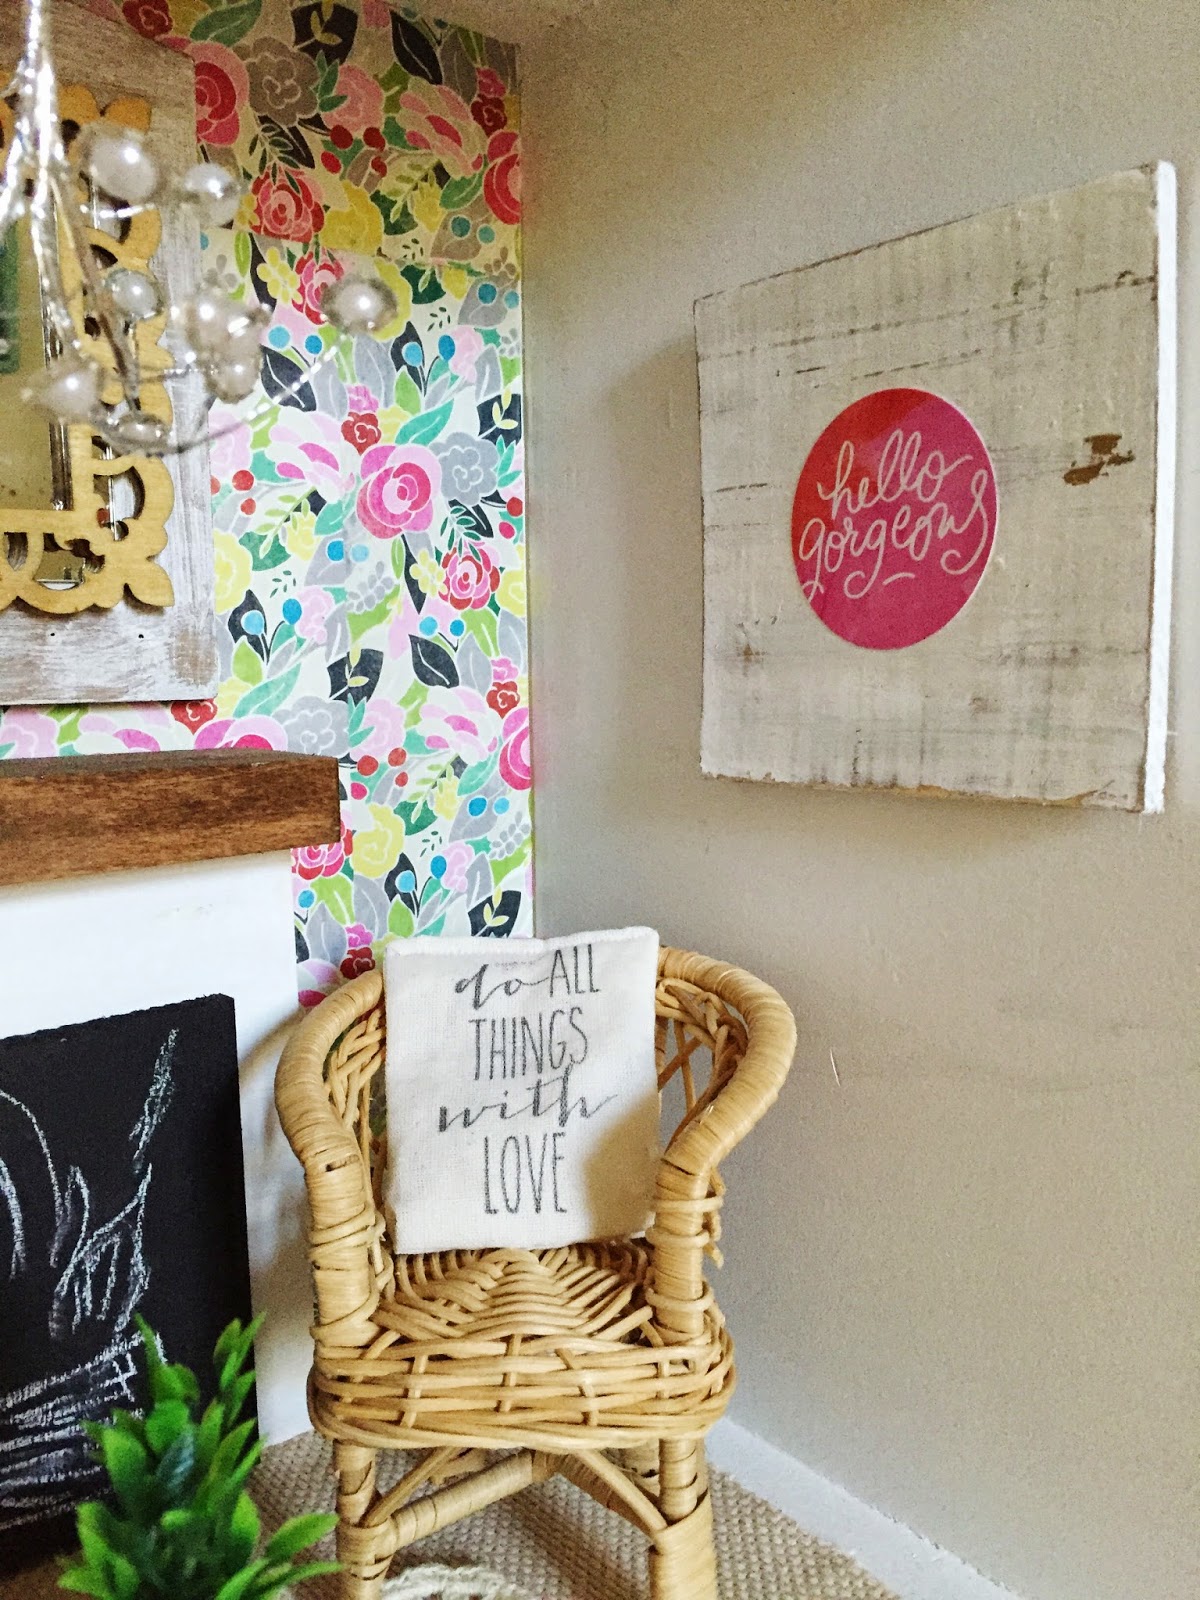
It's hard to find Barbie size furniture that's not pink and plastic, but I found these wicker chairs (as well as the wicker furniture in the girl's room) off of Ebay.  Most everything else is just wood scraps that I glued together in order to make the fireplace, mirror, and wood sign.


The chandelier was something I found on clearance in the wedding decoration aisle at Michaels and I decided I could make it look like a fun chandelier.  


I designed the washer/dryer/shelves and Tim made them with wood scraps.  I made the mop with a paintbrush and yarn.  And I painted to floors a checkerboard pattern.


And finally, the master bedroom...


Again, the chandelier is a Christmas ornament.  I made the headboard with wood scraps. I sewed the bedding and made the pillows.  


The chest of drawers was a drawer from a small jewelry chest.  I just turned it on it's side and glued wood pieces on to make "drawers" and painted it.  The sign is a small print by Katie Daisy that we already owned.  I just made the frame to go around it. And I used a scrapbook paper with a stenciled pattern to paint the fun pattern on the floor.


This project was really a lot of fun for me.  I don't think Tim enjoyed it quite as much!  But we both love seeing Peyton enjoy it and play with it.  And maybe one day, our grandkids will play with it too!


Saturday, December 13, 2014

Christmas Home Tour

Happy Saturday!!  Here we are with Christmas just under two weeks away and I can hardly believe it.  It seems like we just went trick or treating with the kids.  Thankfully this Christmas season has not been too terribly stressful when it came to present shopping and just the general busyness of the season.  We knocked out almost all of our Christmas shopping on Black Friday while sitting at home in our pjs, drinking coffee, and hunting down the online deals; which was great.  And this year, I just haven't attempted to fill our schedule with too many things.  We've made gingerbread houses and watched a few Christmas movie favorites. I still want to fit in making cookies with the kids and one night we will all hop in the van, make a stop at Chickfila for peppermint shakes, and drive around and look at Christmas lights, but I don't want to stress out about doing too much.  I want to enjoy the anticipation that comes with this time of year.  I want to be present and aware.  I don't want to be so busy doing that I miss the being.

My favorite thing right now is to get up early in the morning, when it is still dark outside and while the kids are still nestled snuggly in their beds and dreaming of sugarplums, sneak past the kids' bedrooms, plug in the Christmas tree lights and the lights on my mantle, make a cup of coffee and sit with Jesus.  This is where I find peace and hope for my day.  This is when I hear Him whisper to me.

Some months ago, I had gotten out of the habit of getting up early and spending quiet mornings alone with Him. I was getting up right before I had to get the kids up for school. Then after sending them off to school, I would attempt to sit down with my coffee and Jesus, but Hudson was not usually very cooperative during this time and needed my time and attention. I would end up getting frustrated with him for interrupting me. And so it just wasn't the same.  There is grace for mommas in all seasons and I've been in seasons when time alone with Jesus just wasn't happening.  That is okay and there is no rule about having quiet times.  But my heart misses Him when I don't get that alone time with Him.  So then a week or so ago, I told the Lord if He would wake me up early, I would get up and spend the quiet mornings with Him.  And you know what?  He did.  Day after day, He's been waking me up and I love it.  There is something special to me about this time of year and spending the mornings with Him.  I can't explain it.  At night, when I go to bed, I look forward to the next morning. And I even started setting my alarm because I really don't want to miss it.  But He's still been waking me up just before my alarm goes off.  


While I'm here writing and you're here reading, I thought I would give you a little Christmas home tour.  This year, I really wanted to keep the Christmas decorations simple.  I didn't want a lot of red and green decorations sitting around, cluttering up every nook and cranny of my home. There is nothing wrong with that of course, but for me, simple is peaceful; and less is calming.  Too much stuff overwhelming my home gives me anxiety and then I just start going through the house throwing things in the trash.  Seriously.

A few months ago, I read a quote by Nate Berkus that has stuck with me.  He said, "... my goal is to create a feeling for our homes, not a theme."  And that is exactly what I want in my home.  When you walk into my home, I want you to feel warm and cozy.  I want it to feel Christmasy, but not look overly decorated or styled for Christmas.  For me, neutrals, natural elements, candles, and cozy textures make it feel warm, cozy and Christmasy without screaming "Christmas", so that is what I used this year.


 I am hoping that after Christmas, when we toss the trees in the trash, most of the decor will still be versatile enough to just stay up through the winter.  


The pom pom garland is from Anthropologie.  I've seen it all over my Instagram feed and just love the thick, nubby texture of it.  The pom poms remind me of snowballs, but still have a cozy, warm feel to them.  


A simple boxwood wreath from Trader Joes filled a blank spot on my wall.


I'm sure I've mentioned by now how much I love Joanna Gaines and the HGTV show, Fixer Upper that she does with her husband, Chip.  Well, she also has a shop online called Magnolia Market and it is filled with such fun, unique things.  I found these bells in her shop, as well as that cotton wreath.


And a sweet friend, who knows me well, surprised me with a winter candle from her shop.  It makes my house smell so Christmasy. 


Last year, we put our Christmas tree downstairs next to the fireplace instead of upstairs on the main level.  But I really missed smelling the tree during the day and seeing the tree all lit up in the evenings (since we don't hang out much downstairs). So this year, I decided I really wanted a tree upstairs to enjoy.  We had to rearrange a few things to make it work, but I think it was worth it. I kept the decorations very simple.... white lights, burlap ribbon, and a finger crocheted yarn.  Tim got me this leather pouf last month when he went to Morocco. 


Another thoughtful friend saw this woodsy ornament and said it reminded her of me.  It is the only ornament that made it on this tree because it is perfect and I love it.


And I plopped a bird's nest with a wooden owl at the top of the tree in lieu of a star.


The kids got to decorate the downstairs tree as wild and crazy as they wanted. They used colorful lights and every single ornament we own. I didn't even go back and spread the ornaments out evenly among the branches after they were finished.  I just let it be... perfectly imperfect!  This is progress for me! 


Have a wonderful weekend!

Wednesday, November 12, 2014

Bedroom Dresser Makeover

Not long after Tim and I got married, we got tired of our hand-me-down bedroom furniture, so we went out and bought a big matching set of bedroom furniture.  It seemed like the grown-up thing to do at the time.      

A few years later, I had something of an awakening when it came to decorating our home and I realized that our bedroom furniture (as well as everything else in our house) just wasn't my style at all. The bedroom set we bought was big, bulky, and dark.  It completely overwhelmed our space and I didn't see anyway to make it look better. I wish I could find an old picture for you.

I really wanted to start completely over, find pieces that I really loved, and create a room that was lighter and brighter with an eclectic mix of unique pieces.  So after some major convincing on my part, Tim let me sell our bedroom set on Craigslist.

I've learned that finding what I love takes time.  It takes patience, persistence, and it takes not settling.  But after selling our bedroom set, we had no furniture and our clothes were just sitting there all piled up on the floor.  Obviously we needed something immediately to hold it all.  So we went to Ikea and bought two dressers that would hold our things until I found what I really wanted.

That was four years ago.

Over those four years, I've been on the lookout for a dresser.  I've looked on Craigslist, in thrift stores, antique stores, etc...  I knew I wanted a solid wood, vintage piece that I could paint.  I wanted it to have clean, straight lines, so as not to be overly feminine, but also have some interest to it.  And since we moved to a smaller home a few years ago, we now only have space in our room for one dresser, so it needed to be big enough to hold both mine and Tim's folded clothes.

Finding a dresser with all of these qualities was not easy, but I stayed patient.

Then a few weeks ago, my in-laws were here visiting and we were loading up in the Jeep getting ready to go to Target when I got a text from a neighbor alerting me to a "darling long dresser... really unusual... lots of potential" that someone had sat out on the side of the road in our neighborhood for the trash pick-up.  This neighbor knows me and knows my love for painting and making over old furniture.  Obviously I was interested at this point.  So we drove off to find the dresser.  As I pulled up to it, I immediately noticed it's unique vintage look.  It was extra long and had clean, straight lines.  I hopped out to give it a closer inspection. I wanted to check if it was solid wood (yes), to make sure the drawers worked (yes), and that they were in good condition (yes).  

I could see the potential in it and I knew I wanted it.  So Pop Pop stayed back to guard the dresser while Mimi, Hudson, and I went home to get the van (since the dresser was not going to fit in the back of the Jeep).  Within the few minutes we were gone, three people stopped to look at it and the trash truck showed up to take it away in the trash.  We pulled up with the van just as Pop Pop was telling the trash guys we were going to keep the dresser.  This was perfect timing because instead of throwing the dresser in the trash truck, those guys kindly loaded it up in the back of the van for us.  I was so thankful for that because it was such a heavy dresser that we would have had an extremely hard time loading it up ourselves.

Here she is - the before picture:


The next day we removed all the hardware and I wiped it down with a liquid sander/de-glosser.  Using the sander/de-glosser wasn't necessary (according to chalk paint directions), but I had some on hand and figured it could only help. Then I got right to work painting it with Annie Sloan pure white chalk paint.  I have always loved her chalk paint because there is no real sanding or priming involved, so you can go straight to painting.  This is perfect for me, as I am always anxious to start seeing the transformation.

But this time, I had problems.  After I painted the main part of the dresser, I noticed that there were several spots on the top that were cracking and peeling as the paint dried.  I had never seen or heard of this before with chalk paint, so I was pretty confused and frustrated.  I hand sanded down those spots and re-painted only to have the same thing happen again.  After googling this, I discovered this does happen sometimes with AS chalk paint and there doesn't seem to be a clear reason why.  It seems to happen most often with the pure white and old white colored chalk paint though. 

My suspicion was that something oily had spilled on the top of the dresser and this was keeping the paint from adhering in those spots.  Through googling, I learned that I could try sanding down the entire top, then putting a layer of shellac down, and then re-painting.  Not fun, but since there didn't seem to be another real option and we didn't have much to lose at this point (except our time and a few bucks for shellac), we decided to give it a try.

BUT.... after sanding the top all the way back down to the wood, I completely fell in love with the overly distressed look and decided not to re-paint it after all.  I just sealed it with the Annie Sloan wax and called it done.  It was a perfectly happy accident.


At this point, I loved how it looked, but we discovered that it had a bit of a bug infestation.  Yuck.  So Tim had to take it back outside to spray it down twice with bug killer.  The drawers were also extremely smelly.  I googled this problem too (what would we do without the internet?) and found all kinds of ways to get the smell out.  I tried many of them.  I wiped them out with a vinegar/water mixture, set coffee grounds in cups inside of them, let them air out outside... none of that worked very well, so I ended up polyurethaning the inside of all the drawers.  I'm glad I did because I feel like that sealed up any germs and smells, so they won't get on our clothes, especially since we really don't know where this thing has been or what has been inside of it.

As many issues as this dresser came with though, I absolutely love how it turned out and I think it was totally worth all the extra effort.

Here's the after pictures:


I ordered these brass ring pulls and I really like their classic simplicity.  There is brass on the front feet of the dresser too, so they complement each other nicely. 


I also really like the detailing of the round front edges.  It's not overly fancy or anything, but it adds some extra interest to the piece.


The most fun thing about these projects is seeing the amazing transformation.  It's not quite what I had envisioned when I started this project, but in the end, I love it even more than I originally imagined.

I love that it's unique.  I love that it has a story behind it.  I love that my in-laws were involved in finding it and helping me haul it home.  And I love that Tim and I both worked on it to make it our own.  I hope it will be something that we have and enjoy for a very long time.

What about you?  Have you ever had a project go all wrong, but then end up better than you ever thought?