
For the past few months, Tim and I have been working hard on a secret Christmas project for Peyton.
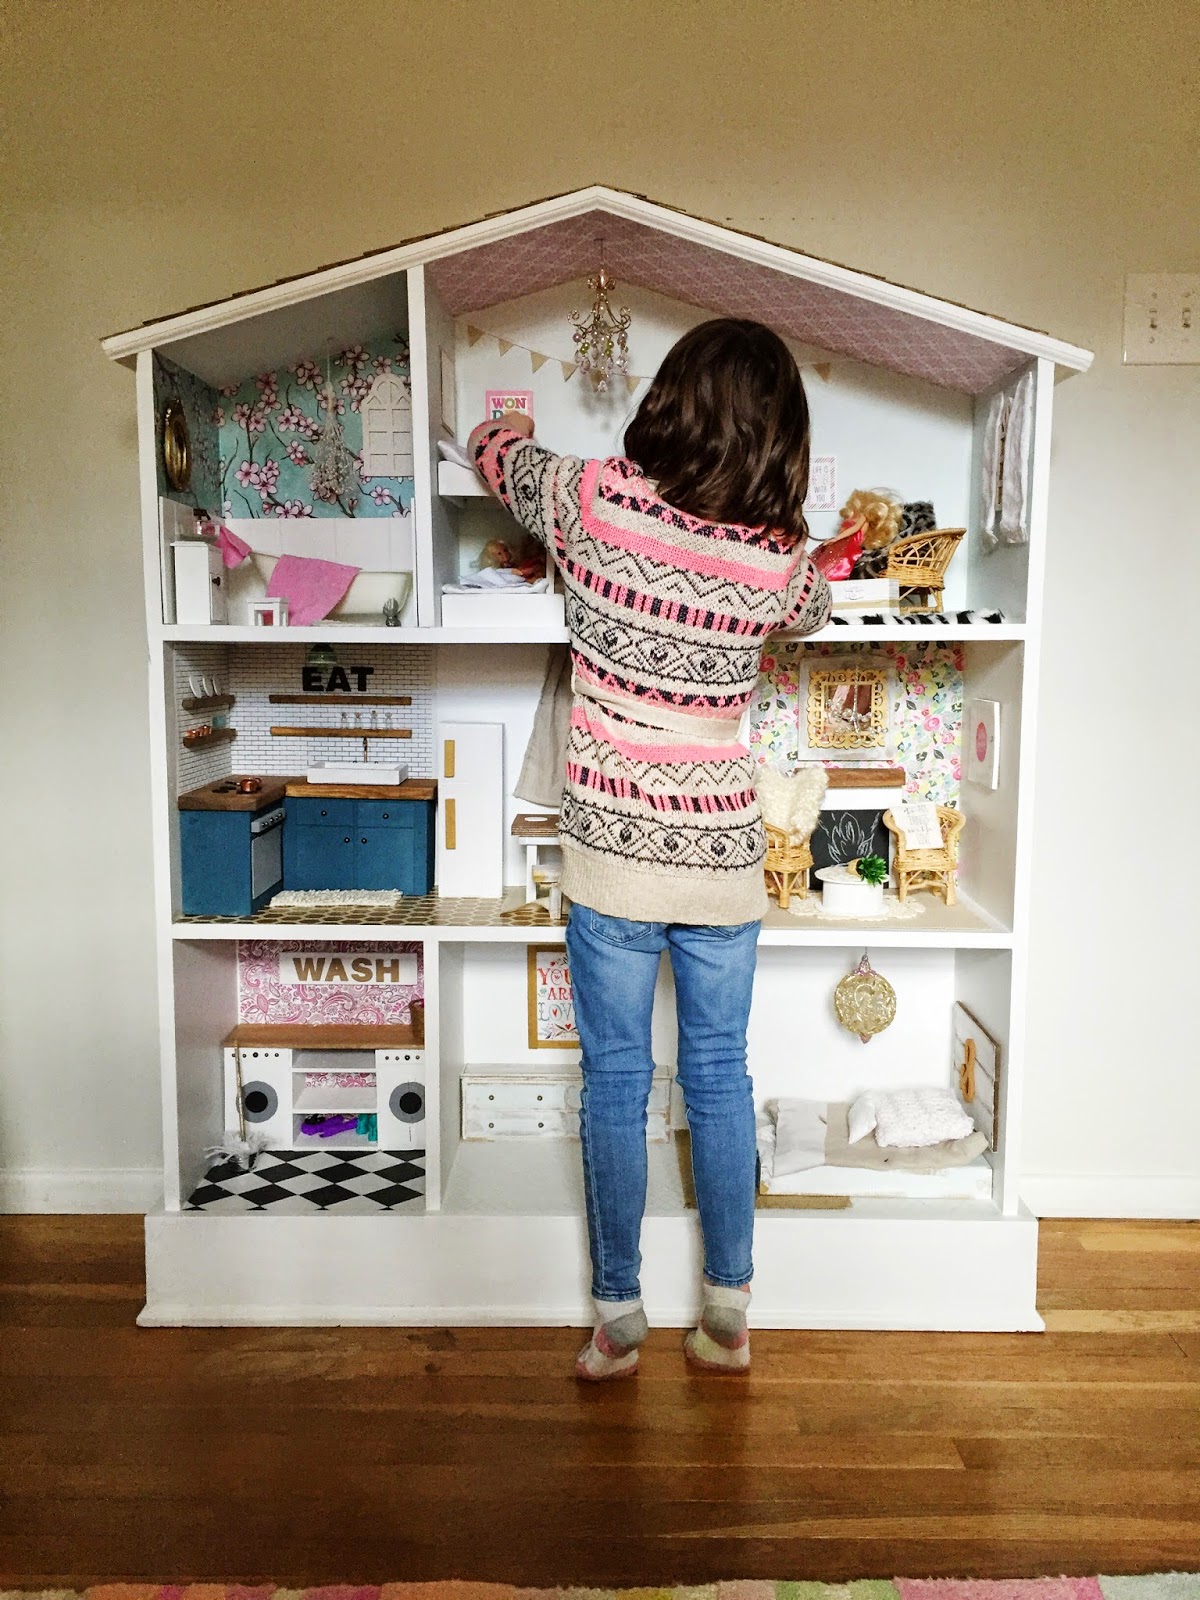
She had been asking for a dollhouse for her Barbies. Of course, we could have just gone out and bought the Barbie Dreamhouse right off the Target shelf, but where's the fun in that, right!? And honestly, I just don't love big plastic pink toys. Plus months and months ago, I saw this dollhouse at Handmade Home and was totally inspired to do something similar for Peyton one day. So back in October, when I spied this bookcase/dollhouse at Goodwill, I snatched it up with the intention of giving it a huge Barbie dollhouse makeover just in time for Christmas.

I cannot even tell you the amount of hours and money we put into this thing. Tim gets so much credit for putting up with me throughout this dollhouse renovation. Basically, he was the carpenter and I was the interior designer. I made lists of all the projects I needed him to do and in his free time, he worked so hard to get them all done. (And then I would add more to his list!) And this isn't so much his thing, but he did it for me and for Peyton. I am so thrilled with the final product. And best of all, Peyton loves it too. She is the type that notices and appreciates pretty design and fun decor, which makes it extra fun for me to do something like this for her.

So if you're interested, I'm going to take you on a little tour. If you're not into dollhouse renovations, you may just want to skip this post.
We'll start with the roof. Tim cut all these little pieces of wood and attached them for me. Then I stained them. It gives the dollhouse a fun cottage feel.

Next up, the bathroom.
I modge podged the walls and the floors with scrapbook paper and then Tim added the beadboard (left over from our mudroom project) to the walls. I found the bathtub on Ebay.

The bathroom mirror was a tiny picture frame and I glued a mirror on the back (which is hard to tell in this photo because it's reflecting the wallpaper). The towel holder is a ring pull. The vanity was a tiny drawer that I cut and glued wood slabs on to make it look like a cabinet. It was both fun and challenging to figure out creative ways to make dollhouse furniture and accessories throughout this project.

The girl's room.
I modge podged scrapbook paper on the ceiling and painted gold dots on the floor. I found the dresser, small chest, and the wood pieces (to make the bunk beds) all at Michaels.


The chandelier is a Christmas tree ornament.


The kitchen:
The light fixture is a drawer knob/pull. I found the "subway tile" in the dollhouse section at Hobby Lobby. It was actually a plastic sheet of red brick, but I painted it to look like subway tile. Tim made the cabinets, countertops, and refrigerator from blocks of wood, which we then painted, stained and embellished. The "faucet" is just a hook that I painted gold.


The chandelier is another Christmas tree ornament that I painted. Tim made the farmhouse table and bench. And I found the small chalkboard at Hobby Lobby. The floor is modge podged scrapbook paper and the rug is a piece of burlap (found in scrapbook paper section of Michaels). I sewed the curtains from scrap fabric.

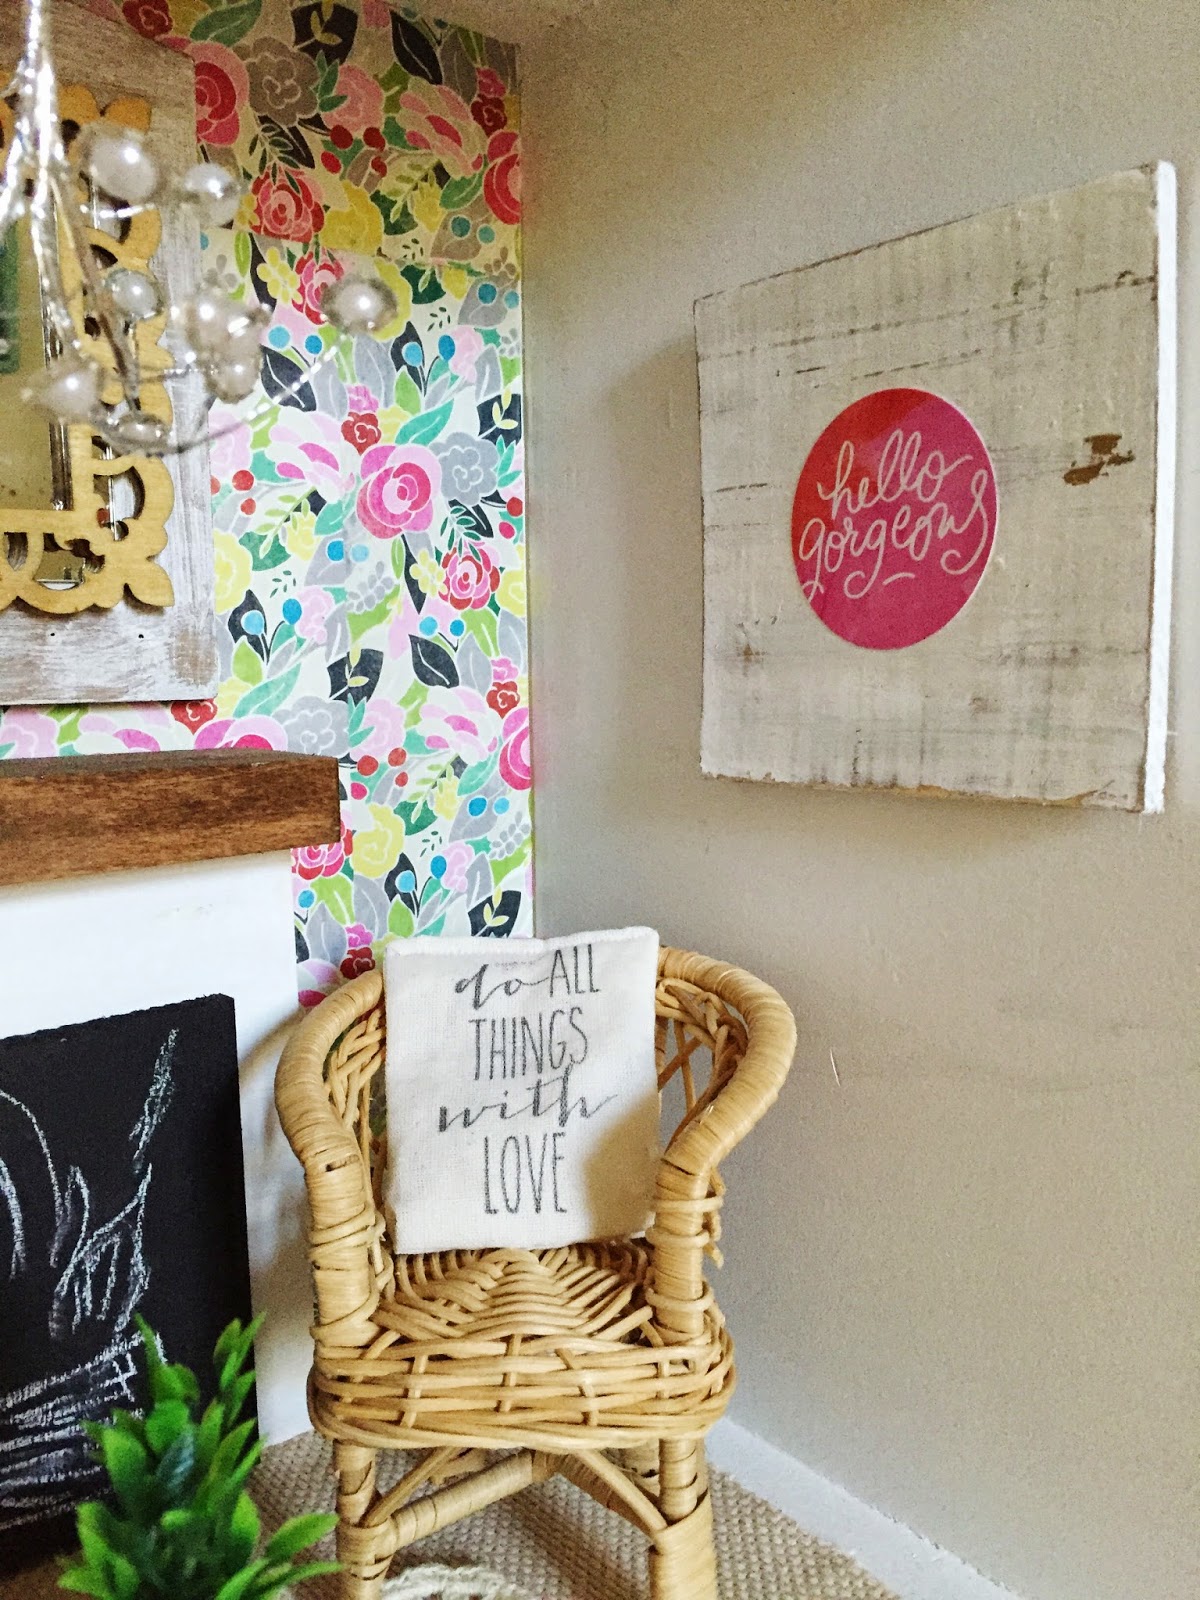
Living Room:
It's hard to find Barbie size furniture that's not pink and plastic, but I found these wicker chairs (as well as the wicker furniture in the girl's room) off of Ebay. Most everything else is just wood scraps that I glued together in order to make the fireplace, mirror, and wood sign.

The chandelier was something I found on clearance in the wedding decoration aisle at Michaels and I decided I could make it look like a fun chandelier.
I designed the washer/dryer/shelves and Tim made them with wood scraps. I made the mop with a paintbrush and yarn. And I painted to floors a checkerboard pattern.

And finally, the master bedroom...

Again, the chandelier is a Christmas ornament. I made the headboard with wood scraps. I sewed the bedding and made the pillows.

The chest of drawers was a drawer from a small jewelry chest. I just turned it on it's side and glued wood pieces on to make "drawers" and painted it. The sign is a small print by Katie Daisy that we already owned. I just made the frame to go around it. And I used a scrapbook paper with a stenciled pattern to paint the fun pattern on the floor.

This project was really a lot of fun for me. I don't think Tim enjoyed it quite as much! But we both love seeing Peyton enjoy it and play with it. And maybe one day, our grandkids will play with it too!

Omg. What an amazing dollhouse!! I would have died over this when I was a kid. I'm sure your daughter will enjoy it for years. I just found your blog thru the Home Made Lovely tours. I can't wait to browse! :)
ReplyDeleteThank you Lauren!
DeleteThat is SO precious and i love all the creative ideas!!! What a treasure.
ReplyDeleteAbsolutely love it! What a great decorator you are. I know she is going to enjoy it for a long time.
ReplyDeleteSimply amazing! You certainly have an eye for design and Peyton is one lucky little girl!
ReplyDeleteThis is truly amazing!! I am so in love with this and you (and you hubby) are so creative!! I had a shelf from Pottery barn that was just like that... I so wish I hadn't sold it!! And we just purchased the "plastic" Barbie Dream House.... What a nightmare!!! Excellent job & thanks for sharing!!
ReplyDeleteOh my word Jaime!!! This house is amazing!!! Really really good job to the both of you, and it's so detailed! I wish my real house looked as good!!
ReplyDeleteRIDICULOUSLY AMAZING. I have almost an exact replica of your thrifted dollhouse and have been thinking through ideas to decorate. Your version completely blows me away -- your daughter is very blessed!
ReplyDeleteI made one for my granddaughter for her Birthday. She loves it.
ReplyDeleteI'm so glad!
DeleteThis is AWESOME!!! Thank you for sharing your ideas! This has made me SO excited to redo an old dollhouse I was given for my daughter. You are so creative! God bless
ReplyDeleteOh my word!!!! This is INCREDIBLE! I’m making one for my kids for Christmas, and using yours as inspo.
ReplyDeleteThank you! I hope you have lots of fun making it and that your kids love it!
DeleteWhat an inspiration for the doll house I'm going to work on for my grandkids!
ReplyDeleteGorgeous dollhouse! We are looking to make/create one for our daughter and I thought it was so cool also that I’m Jamie and my daughter is Peyton also! So funny!
ReplyDeleteEnjoyed your story. My Granddaughter is about 2 years old now. Someone gave her a Plastic box store crayon colored doll house about the size of a large shoe box. She plays with it, but anything besides plastic would not survive her version of playing . Sort of like Godzilla attacking the city on a miniature scale. But it did set me on the path of a larger dollhouse along the lines of what you did as a make over. Found at Goodwill a dollhouse that was loved to ruin almost, but was sound and still sturdy. My Husband and I have enjoyed the journey. Huge amount of time. We had to become designers, carpenters, tilers, roofers. Ect. All the trades involved. No permits pulled during the construction. Scrape lumber and salvaged fines . After all this, we have to put it into storage till Godzilla grows up a bit. Liked what you did to your project. Like you we had fun making the dollhouse. We built it to survive generations , have visions of Great Grands playing with it.
ReplyDelete