
Going into this kitchen renovation, I knew the major things that I wanted… white shaker cabinets, butcher block countertops, and a farmhouse sink. But when it came down to the smaller details like which faucet style or what kind of range hood, I hadn’t given it much thought and I really had no idea what I wanted. I guess I initially thought that those little things wouldn’t matter too much as long as I got the big things right. But through this process, I’ve realized that those little details do matter and they make a big difference in the final outcome of your kitchen. It could kind of be compared to putting on jewelry after you’ve put on your clothes. The jewelry you choose can possibly make or break your outfit. Your jewelry can be really elegant or it can be very simple and understated or it can just look cheap or even thoughtless. But in the end, what you pick does matter in your overall look.
So since I was pretty much clueless about what I wanted, I had to do a lot of research to really nail down what I liked when it came to these things. I’ve spent the last few weeks searching Pinterest and reading kitchen renovation blogs to see what’s out there, what others recommend, what I think looks good, and what doesn’t.
In the end, here are the things we’ve decided on:
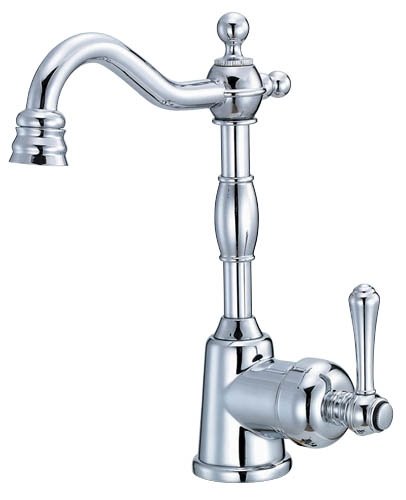
I really wanted a bridge faucet, but since we only have one faucet hole to work with, I decided on the Danze Single Handle Bar Faucet. I wavered back and forth between a chrome finish or stainless steel. But in the end, I went with chrome, because I wanted it to have a little bling to it. I mean it you’re going to have a nice faucet, it might as well shine and make that farmhouse sink look extra pretty. And I also realized that every pin on Pinterest in which I liked the faucet, was a chrome faucet. Gotta go with what you love.
We ended up returning our Ikea 36” range for the NXR 30" Pro-Style Gas Range. A detail that we had overlooked was that the Ikea range took a 240 watt outlet and our outlets are the typical 120 watts and we didn’t want to add any extra electrical work than was necessary. Plus I really didn’t need the larger 36” range with six burners. A 30” range with four burners will be plenty big for our family and it will also allow me to have those extra 6” in counter space and cabinets.
And I love the look of this one better anyway.

Plus, look, it’s blue inside!

When it came to the range hood, at first I really didn’t have much of an opinion, but in an effort to make an informed decision and to make sure I would be happy with my choice for the long term, I did my Pinterest research.
I do like the big range hoods like this

But, for whatever reason, Tim wasn’t much of a fan.
And we are going to have cabinets on both sides or our hood, so ours would look more similar to this (below picture) and neither of us really loved how that looked.

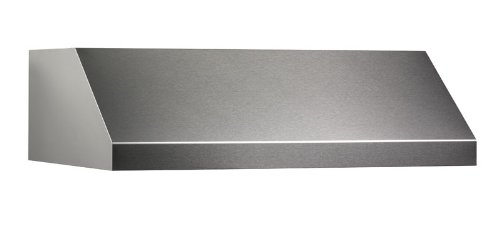
But when we came across this next picture, we both immediately agreed that we loved the look and that it would work well in our kitchen.

The above range hood is a Viking and runs upwards of $1000, so we settled on this much more affordable, but nearly identical, Broan Pro-Style Range Hood in Stainless Steel.
I’m still in the decision making process when it comes to pulls and knobs. I’ve already bought these from Restoration Hardware. I love the pulls, but I’m not in love with the knobs and they may get returned. I kinda want to do something a little more fun with the knobs.


I love what The Inspired Room did in her kitchen. If you look closely, you can see that the top knobs are different from the bottom knobs. It’s fun and unexpected, a little bit quirky and I’m really liking it.

At this point, we’re still in the process of cutting and installing the butcher block counter tops. Cutting them has been really nerve-wracking. We measure, measure, measure, hold our breath, and then Tim cuts. We still have two more to cut. I’ll be excited when this part is over. It’s too stressful for me (and I’m not even the one with the saw!).
Once it’s done and they’re installed, I hope to be back with a blog post about it.


